AI News
19 Oct 2025
Read 15 min
Google Photos conversational editing guide How to edit photos
Google Photos conversational editing guide lets you fix reflections, add lighting and reimagine scenes.
Edit photos by talking. This Google Photos conversational editing guide shows how to fix glare, erase distractions, add studio lighting, widen a tight crop, restore old images, and even create playful scenes with simple prompts. Open a photo, tap “Help me edit,” describe the change, preview, and save a copy you can share.
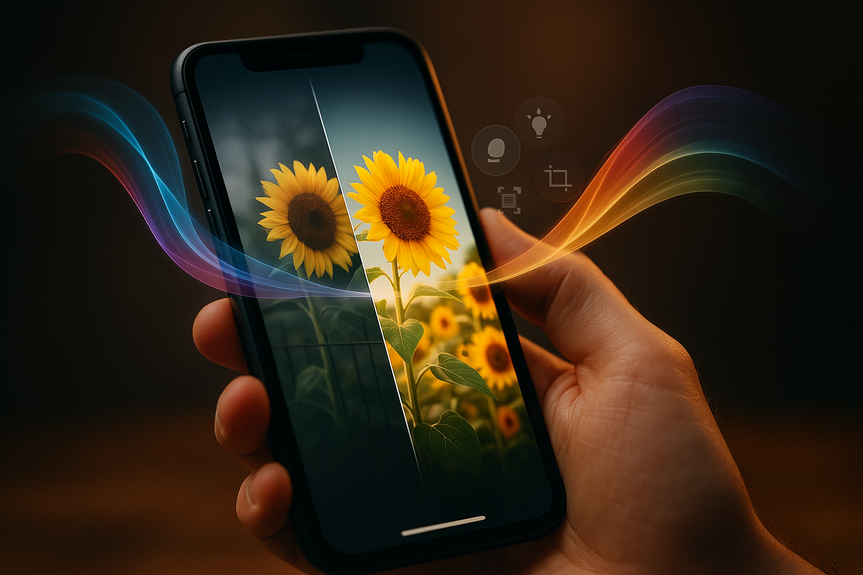
You can now give Google Photos clear instructions in plain English and watch your picture change in seconds. Open an image, tap “Help me edit” in the editor, and type or speak what you want to change. Eligible Android users in the U.S. can use this today. You can remove window glare, erase fences, brighten faces, or even turn a grassy hill into a field of sunflowers. You can also combine changes in one prompt to save time. In a few tries, you will get natural, clean results you can post anywhere.
Open Google Photos and select a picture.
Tap Edit, then choose “Help me edit.”
Type or say a clear prompt, like “Remove the reflection on the window.”
Review the preview. If needed, add detail: “Also brighten the face and sharpen.”
Save a copy to keep your original safe.
Keep prompts short and specific. Mention the subject, the area to change, and the final look. For example, “Erase the fence in the background and sharpen” is better than “Make it better.”
“Remove the reflection on the window.”
“Reduce glare on the glass door and keep the colors natural.”
Tips:
Point to the surface: window, mirror, water, or screen.
If faces look hazy after glare removal, follow up with “Sharpen faces slightly.”
“Erase the fence and the text at the bottom, zoom out a little, and sharpen.”
“Remove the trash can on the left and smooth the background.”
Tips:
List items in the order you want them fixed.
Describe the location: top-right, near the shoes, behind the sign.
“Add studio lighting to make me stand out.”
“Brighten the face, soften shadows under the eyes, and reduce shine.”
Tips:
Use gentle language like “soft,” “subtle,” or “natural.”
Ask to keep skin tones accurate: “Keep natural skin tone.”
“Expand the composition and center the subject.”
“Add a bit more sky and foreground, keep the horizon straight.”
Tips:
Specify direction: “Add space on the left,” or “Widen the background right side.”
Follow up with “Make the composition more balanced.”
“Reimagine this room with a bookshelf and warm lights.”
“Add a floor lamp in the back-right corner and a small plant on the table.”
Tips:
State style words like “modern,” “minimal,” or “cozy” for guidance.
Name the area: “under the window,” “next to the sofa.”
“Fill the grass with beautiful sunflowers.”
“Add a few wildflowers near the path, keep it subtle.”
Tips:
Use quantities: “a few,” “some,” “a field full of.”
Ask to match light: “Match the lighting and perspective.”
“Add a cute pumpkin costume to my dog.”
“Put a red scarf on the dog and a small hat, keep proportions realistic.”
Tips:
Request natural shadows to blend the costume with fur.
Say “fit the costume to the pose.”
“Restore this old photo and make it sharper.”
“Reduce scratches, fix color fade, and improve clarity.”
Tips:
Ask for “subtle sharpening” to avoid a plastic look.
If colors look off, follow with “Correct the white balance.”
“Straighten the photo, fix the shadows, and make the grass greener.”
“Warm the colors, reduce noise, and slightly increase contrast.”
Tips:
List actions in order of importance.
Use gentle modifiers: “slightly,” “a bit,” “subtly.”
“Make it look like my dog is skiing on the Moon. Add a small spaceship on the ground and Earth in the background.”
“Place the child on a sandy beach at sunset with soft golden light.”
Tips:
Set the scene: location, time of day, and focal elements.
Ask to “keep proportions realistic and lighting consistent.”
Subject first: “the face,” “the dog,” “the sky.”
Action second: “brighten,” “erase,” “sharpen,” “expand.”
Location third: “top-left,” “background,” “near the sign.”
Style last: “natural,” “subtle,” “warm,” “soft studio light.”
Examples:
“Brighten the face slightly, reduce shadows under the eyes, keep skin tone natural.”
“Remove the people in the background on the right and smooth the sky.”
“Add more room on the left side and keep the horizon level.”
If the first preview is close but not perfect, add a short follow-up:
“A bit less sharpening.”
“Make the background blur softer.”
“Reduce the warmth slightly.”
Use reference words for consistency:
“Make it look like soft window light.”
“Match the color of the previous photo.”
Always save a copy. Keep the original untouched.
Name the copy or add it to an album like “Edited Drafts.”
Use versions: accept an edit, then add small refinements in steps.
Zoom in to check edges around hair, glasses, hands, and text.
Compare before/after. If it looks overdone, dial it back with a gentler prompt.
Export high resolution for printing; compress only for social posts.
Use the Create tab to find other tools—collages, highlight videos, and auto-enhance options—that work well with your conversational edits.
Be honest with context. If you change major elements, label the image as edited when it matters.
Respect privacy and consent. Avoid adding or removing people in ways that could mislead others.
Be careful with logos, signs, or documents. Make sure edits do not change meaning or create false claims.
Keep a backup of the original. You may need to show what was actually captured.
“Warm the colors slightly.” adds a cozy tone.
“Cool the shadows” helps winter scenes look crisp.
“Lift midtones” brightens without blowing highlights.
“Sharpen faces slightly, reduce noise in the background.”
“Add a gentle background blur to separate the subject.”
“Increase contrast on the subject and lower background saturation.”
“Vignette lightly around the edges.”
“Straighten horizon, expand canvas left and right.”
“Re-center the subject and keep proportions natural.”
Exposure: “Brighten slightly” or “Recover highlights.”
Subject: “Add soft studio lighting to the face.”
Distractions: “Erase the sign in the background, smooth the wall.”
Color: “Warm the tones a little; keep skin natural.”
Detail: “Sharpen slightly; reduce noise in dark areas.”
Framing: “Expand the composition and center the subject.”
Final polish: “Add a subtle vignette.”
Save a copy and review at 100% zoom.
Meet conversational editing in Google Photos
You describe the edit, and Photos does the work. The app reads your prompt, suggests an edit, and shows a preview. You can accept, refine your request, or undo. Try this simple flow:Google Photos conversational editing guide: core fixes that save your shots
1) Remove reflections and glare
Reflections on glass and screens can ruin an otherwise perfect shot. Ask Photos to remove them and restore clarity. Try:2) Erase distractions and clean up the background
You can remove unwanted objects, old timestamps, and visual noise in one go. This is great for travel photos, sports shots, or family pictures with messy backgrounds. Try:3) Add studio lighting for better portraits
When a photo is flat or backlit, ask for soft studio light. This makes your face stand out without harsh shadows. Try:4) Expand a tight crop and improve framing
Sometimes you captured the moment, but the composition feels cramped. Ask Photos to add space around your subject and balance the scene. Try:Reimagine your space and have fun
5) Preview interior changes
Use Photos to visualize decor ideas. You can add furniture, lighting, or style notes to see what might work in your room. Try:6) Turn a plain scene into something special
Add life to outdoor photos with natural elements. This can help you create postcards and social posts that pop. Try:7) Dress up your pet with seasonal flair
Get festive photos without wrestling your dog into a costume. The app can place a holiday outfit convincingly. Try:8) Restore old photos with a simple prompt
Bring faded prints back to life. Improve exposure, reduce noise, and sharpen soft details. Try:Make many edits at once
9) Combine changes in one clear request
Save time by stacking your asks. You can straighten, brighten, and recolor in a single prompt. Try:10) Go big with creative scenes
Want something wild for a story or card? Generate imaginative edits with specific details. Try:How to write better prompts
The right words lead to better edits. Use this simple structure and you will get consistent results.Practical workflow that keeps your originals safe
Editing should never risk your favorite memories. Keep these simple habits:Limits, availability, and responsible use
Conversational editing is rolling out to eligible Android users in the U.S. You can type or speak prompts in the editor. Results depend on your photo and your instructions. Hardware and account eligibility can vary. Be a responsible editor:Power tips to get pro-looking results fast
Refine light and color with simple words
Control detail and clarity
Guide the viewer’s eye
Fix composition without crops
A quick checklist you can use on every photo
Use this lightweight Google Photos conversational editing guide checklist while you work:When to go subtle vs. when to go bold
Subtle edits are best for portraits, travel memories, and family events. Aim for natural skin tones, clean backgrounds, and true-to-life colors. Bold edits shine in creative posts, invitations, posters, or mood boards. If you are going big, keep a natural anchor—consistent lighting or realistic shadows—so the image still feels coherent. A good rule: start subtle. If you want more drama, add it in small steps, one prompt at a time.From quick fixes to creative storytelling
Conversational editing makes photo polish feel like a chat. In minutes, you can rescue a glare-heavy portrait, remove clutter from a sports shot, restore an old print, or build a fun, imaginative scene for social media. You get speed without juggling sliders. You get control without learning a new tool. And you stay in the flow by simply asking for what you want. With the tips, prompts, and workflow above, you have a clear map to better pictures in less time. Use this Google Photos conversational editing guide to work smarter, not harder, and to keep your memories looking their best. Your photos deserve to shine. Whether you are cleaning up distractions, adding soft light, or reimagining a scene, this Google Photos conversational editing guide helps you move from rough shots to share-ready images with a few well-chosen words.(Source: https://blog.google/products/photos/how-to-tips-editing-prompts/)
For more news: Click Here
FAQ
Q: What is conversational editing in Google Photos?
A: Conversational editing lets you describe the change you want and Google Photos applies the edit automatically. This Google Photos conversational editing guide shows how to open an image, tap “Help me edit,” type or speak a prompt, preview the suggestion, and save a copy.
Q: How do I start using the “Help me edit” feature?
A: Open a photo in Google Photos, tap Edit, then choose “Help me edit” to type or speak your prompt. Review the preview, refine if needed, and save a copy to keep the original safe.
Q: What kinds of edits can I ask Google Photos to make?
A: You can ask for core fixes like removing reflections, erasing background distractions, adding studio lighting, expanding a tight crop, restoring old photos, or adding playful elements like flowers or costumes. You can also combine multiple actions in one prompt and preview the suggested edit before saving.
Q: Who can use conversational editing and where is it available?
A: Conversational editing is rolling out to eligible Android users in the U.S., and you can type or speak prompts in the editor. Availability depends on hardware and account eligibility, so access may vary.
Q: How should I write an effective prompt for conversational edits?
A: Keep prompts short and specific by stating the subject first, then the action, location, and desired style — for example, “Brighten the face slightly, reduce shadows under the eyes, keep skin tone natural.” The Google Photos conversational editing guide also recommends listing items in order of importance and using gentle modifiers like “slightly” or “subtle” for consistent results.
Q: Can I undo edits or preserve the original photo?
A: Yes — you can preview suggested edits, refine or undo them, and the workflow encourages saving a copy so the original remains untouched. A practical habit from the guide is to name the copy or add it to an album like “Edited Drafts” and use versions for further refinements.
Q: Are there ethical or usage guidelines when using conversational editing?
A: Be responsible: label images when major elements are changed, respect privacy and consent, and avoid edits that could mislead others by altering people, logos, signs, or documents. The Google Photos conversational editing guide also urges keeping a backup of the original in case you need to show what was actually captured.
Q: What workflow tips help achieve pro-looking results quickly?
A: Follow a quick checklist: adjust exposure slightly, add soft studio lighting to the subject, erase distractions, warm tones as needed, sharpen subtly, and expand composition when appropriate. Zoom to 100% to check edges, compare before/after, save a copy, and export high resolution for printing or compress for social posts.
Contents