AI News
29 Oct 2025
Read 18 min
How to try Photoshop AI tools and speed edits instantly
how to try Photoshop AI tools to automate edits, harmonize color, upscale photos and save hours now
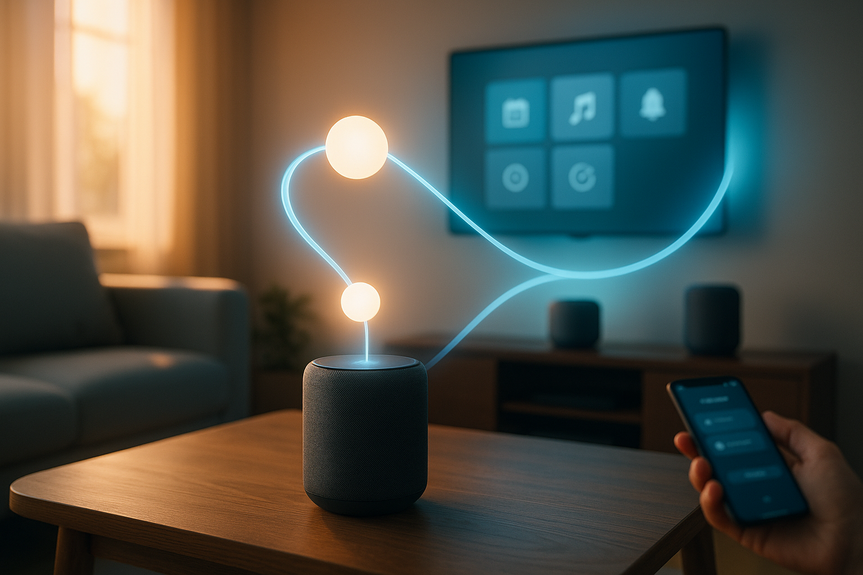
Want to know how to try Photoshop AI tools? Update to the latest Photoshop or install Photoshop (Beta) in the Creative Cloud app, open your image, and test Generative Fill, Harmonize, Generative Upscale, Object Mask, and Assisted Culling. The new AI Assistant is in a private beta waitlist on Photoshop for the web.
Adobe just delivered its biggest wave of AI features for Photoshop. The update focuses on speed, quality, and simple controls that help you finish edits faster. You can automate batches, match lighting in one click, upscale old images to 4K, and isolate subjects in video without rotoscoping. Most features are in a public beta you can try today, while the chat-based AI Assistant is rolling out through a private waitlist on the web.
These upgrades aim at two common pain points: doing the same edits over and over, and making composite images look real. In this guide, you will learn how to set up the beta, what each tool does, when to use it, and how to try Photoshop AI tools with clear, repeatable steps.
Open the Creative Cloud desktop app on your computer.
Go to the Apps tab and check for updates to Photoshop. Click Update if available.
To access the newest beta features, scroll to the Beta apps section and install “Photoshop (Beta).”
Launch Photoshop (or Photoshop Beta) and sign in with your Adobe ID.
Turn on the Contextual Task Bar if you do not see it. Go to Window > Contextual Task Bar.
Tip: Keep your GPU drivers updated and enable Use Graphics Processor in Preferences > Performance. AI features run best with a modern GPU, enough RAM, and a fast scratch disk.
Visit photoshop.adobe.com and sign in.
Open or upload a test image. Look for AI features in the side panel and the contextual bar.
For the new chat-based Assistant, join the private beta waitlist when prompted. You will get access once your account is approved.
Note: The AI Assistant is rolling out gradually. Until you get it, you can still try Generative Fill, Harmonize, Generative Upscale, Object Mask, and Assisted Culling in the desktop beta.
Make a selection with the Lasso, Object Selection, or Marquee tool.
Click Generative Fill in the contextual bar.
Type a prompt (for example, “extend the beach and add gentle waves”).
Open the model menu if available and choose Firefly, Gemini 2.5 Flash, or FLUX.1 Kontext.
Generate and review the variations. Click the arrows to cycle options.
Model tips:
Firefly: Strong all-rounder with Adobe’s safety and content provenance features.
Gemini 2.5 Flash: Fast results for quick ideation and iterations.
FLUX.1 Kontext: Useful when you need nuanced context matching.
Confirm you are logged in with the correct Creative Cloud account (Preferences > Account).
Review Content Credentials if you share work publicly. Go to Photoshop’s settings to enable it.
Know that some features may use cloud processing. Save your work and test on copies of files.
Batch resize or export a folder of images for social media.
Apply the same color adjustments or watermarks to many files.
Suggest steps to fix a flat photo or recover contrast in a portrait.
Guide you through tools you do not know yet, with clickable actions.
How to use it once enabled on the web:
Open a document and click the Assistant icon.
Type a clear request: “Resize all images to 2048 px wide and export JPGs at 80% quality.”
Review the plan the Assistant offers. Approve or edit steps.
Run the task. Preview results and undo if needed.
Prompt ideas:
“Make this portrait warmer, add gentle skin smoothing, and keep the background sharp.”
“Create three crops: 1:1, 4:5, and 16:9, with smart composition.”
“List five suggestions to make this landscape pop without over-saturation.”
Pro tip: Start with “Show me what you plan to do” to keep control. You can accept the steps you like and skip the rest.
Extend a canvas for a print or a social media crop.
Remove distractions like power lines, reflective signs, or stray people.
Add objects that belong in the scene, like “a ceramic mug with steam on the desk.”
Workflow tips:
Work non-destructively. Generative Fill outputs on a new layer by default. Keep it.
Refine your selection edges. Feather 1–2 px to blend better.
Prompt with context: “Continue the wooden floorboards and add soft morning light.”
Compare models. If one output looks off, try a different model without changing the prompt.
Troubleshooting:
Artifacts at edges: Expand your selection slightly beyond the subject and regenerate.
Wrong style: Add simple style cues like “matte,” “natural light,” or “no bokeh.”
Repeating patterns: Regenerate a few times and vary the prompt. Try another model.
Open a low-res image.
Find Generative Upscale in the contextual bar or in the right-click options when a layer is selected.
Choose an upscale factor or target resolution (up to 4K).
Preview results. Toggle noise reduction and edge detail if controls are available.
Apply to a copy so you can compare before and after.
Best practices:
Start from the cleanest version of your image. Remove heavy JPEG artifacts first if possible.
Avoid pushing beyond what the source can support. If it looks crunchy, step one level down.
Sharpen after upscaling, not before.
For faces, zoom to 100% and check eyes, eyelashes, and hairlines for unnatural patterns.
Great uses:
Old family photos that need large displays or prints.
Web images that need to fit 4K slides or screens.
Screenshots that you must read on high-resolution devices.
Place your subject on one layer and your background on another.
Select the subject layer.
Click Harmonize in the contextual bar.
Photoshop analyzes both layers and applies a match.
Adjust strength, warmth, and contrast to taste. Apply to a new layer for easy fine-tuning.
Tips for natural results:
Match the direction and softness of shadows. Add a subtle shadow on a new layer if needed.
Lower the effect opacity to avoid over-matching.
Use a layer mask to limit the effect to the subject’s edges and skin if the clothing looks off.
Real-world examples:
Put a studio-cut product into an outdoor scene with the correct color cast.
Blend a person from a cloudy day shoot into a sunny beach background.
Make a flat CGI object sit believably in a real interior photo.
Open a video layer in Photoshop and show the Timeline (Window > Timeline).
Select the object or person in one frame with Object Selection or by clicking the subject.
Invoke Object Mask from the contextual bar. Photoshop tracks and masks the subject across frames.
Use the mask to apply color grading, blur backgrounds, or add effects without touching the subject.
Tips:
Start with clear footage. Good contrast between subject and background helps tracking.
If tracking slips, correct it on a key frame and let Photoshop re-track.
Keep effects subtle. Motion blur or slight desaturation often looks more natural.
Load a folder of images into Photoshop or Bridge and open the culling view where available.
Enable Assisted Culling. Let it scan for faces, eyes open, focus, and motion blur.
Filter by criteria like best focus, small smile vs. big smile, and variety of angles.
Star, flag, or color-label your selects and export the keepers.
Use cases:
Event and wedding photographers who need quick proof sets.
Portrait sessions where clients want many facial expressions.
Product shoots with tiny differences in angle and sharpness.
Use Smart Objects. They keep your edits flexible and non-destructive.
Group your generative layers. Name them by step so you can roll back.
Save versions. Use Photoshop’s version history or save iterative files.
Set a fast scratch disk in Preferences > Scratch Disks. Free space matters for AI tasks.
Close extra documents while generating to save VRAM and RAM.
Install Photoshop (Beta) from the Creative Cloud app.
Open a test image and enable the Contextual Task Bar.
Run Generative Fill with different models and compare results.
Upscale a low-res photo to 4K with Generative Upscale.
Blend a subject into a new background using Harmonize.
Open a short video clip and test Object Mask on a moving subject.
Import a large shoot and use Assisted Culling to pick winners.
Join the private waitlist for the AI Assistant on Photoshop for the web.
Use Generative Fill when you need to add, remove, or extend content with context-aware results.
Use Generative Upscale when quality matters more than raw size and you want clean 4K output.
Use Harmonize when a composite looks “pasted” and needs shared light and color.
Use Object Mask when you want quick, editable isolation in video frames.
Use Assisted Culling when you must deliver selects fast and avoid human error from fatigue.
Keep edits honest if your project requires authenticity. Disclose generative changes for journalism or academic use.
Add Content Credentials so viewers can see how the image was made.
Keep original RAWs safe. Do not overwrite source files.
Document your steps for clients, especially when using AI to remove or add elements.
These practical steps show how to try Photoshop AI tools without guesswork. Install the beta, open a file, and test each feature on a copy of your work. You will see faster edits, cleaner composites, and smarter selections in minutes. The AI Assistant will boost this even more once your account gets access, but the public beta tools already deliver real gains today.
Conclusion: If you want speed and quality with simple controls, now is the right time to learn how to try Photoshop AI tools. Start with Generative Fill and Harmonize, then add Generative Upscale, Object Mask, and Assisted Culling to your daily workflow. You will save hours and raise your final image quality with less effort.
How to try Photoshop AI tools today
Install or update through Creative Cloud
Use Photoshop on the web and join the AI Assistant waitlist
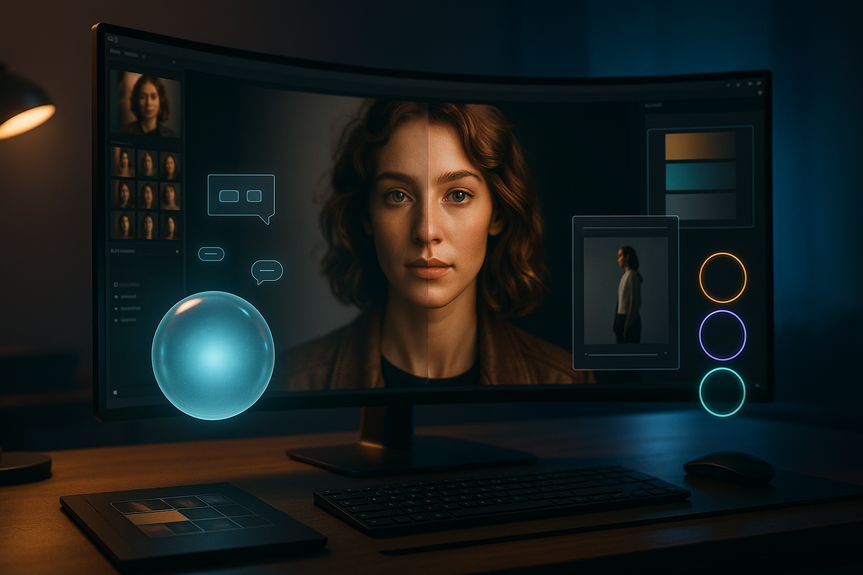
Pick your model for Generative Fill
Photoshop now lets you choose partner models for Generative Fill. In addition to Adobe Firefly’s image models, you can switch to Google Gemini 2.5 Flash or Black Forest Labs FLUX.1 Kontext.Check account and privacy basics
New AI Assistant: Speed up repetitive work with chat
Photoshop’s AI Assistant uses agentic AI to run tasks across your file or across many files. It aims to save time on common jobs while keeping you in control. What it can do:Generative Fill with model choice: Better context, faster ideation
Generative Fill remains a favorite for outpainting, object removal, and adding elements. The new model picker helps you match the job to the right engine. Use cases:Generative Upscale: Bring old photos up to 4K
Photoshop now uses Topaz Labs technology to upscale low-resolution images to 4K, with detail recovery and noise control. How to try it:Harmonize: Make composites look real in seconds
Harmonize matches light, color, and tone between layers. It helps objects and people blend into a new background without hours of manual grading. Quick start:Object Mask: Isolate subjects in video frames
Isolating subjects in video used to mean long rotoscoping sessions. Object Mask speeds this up by detecting people and objects across frames. How to try it:Assisted Culling: Pick winners from big shoots
Sorting hundreds of shots can be slow and tiring. Assisted Culling helps you find sharp, well-composed images fast and lets you filter by focus, angle, and sharpness. Workflow:Performance and workflow tips
Availability, pricing, and credits
These features are available in a public beta for current Photoshop subscribers, except the AI Assistant, which is rolling out via a private beta waitlist on Photoshop for the web. Availability can vary by region and account type. Some generative features may rely on cloud processing and could use credits under Adobe’s policies. Check your Creative Cloud plan details for current limits and terms.Quick start checklist: how to try Photoshop AI tools
When to use which tool
Creative guardrails and best practices
For more news: Click Here
FAQ
Q: How do I install or update Photoshop to access the new AI features?
A: To learn how to try Photoshop AI tools, open the Creative Cloud desktop app, go to the Apps tab and update Photoshop or install “Photoshop (Beta)” from the Beta apps section, then launch and sign in with your Adobe ID. If you don’t see AI controls enable the Contextual Task Bar (Window > Contextual Task Bar), update GPU drivers, and turn on Use Graphics Processor in Preferences > Performance for best results.
Q: How can I access the new AI Assistant and join its waitlist?
A: The AI Assistant is powered by agentic AI to automate repetitive tasks and provide recommendations, and it is rolling out via a private beta waitlist on Photoshop for the web. To join, sign in at photoshop.adobe.com, open or upload an image, and opt into the waitlist when prompted; access is granted once your account is approved.
Q: How do I choose and use different models with Generative Fill?
A: Make a selection with the Lasso, Object Selection, or Marquee tool, click Generative Fill in the contextual bar, type a prompt, and open the model menu to choose Firefly, Google Gemini 2.5 Flash, or Black Forest Labs FLUX.1 Kontext. Compare generated variations and if results look off adjust the prompt, feather selection edges, or try a different model.
Q: What is Generative Upscale and how do I use it to get 4K images?
A: Generative Upscale uses Topaz Labs technology to upscale low-resolution images up to 4K while recovering detail and controlling noise. To use it open a low-res image, select Generative Upscale from the contextual bar or right-click options, choose a target resolution or upscale factor, preview noise and edge controls, and apply the result to a copy for comparison.
Q: How does Harmonize make composites look more realistic and how do I apply it?
A: Harmonize analyzes the subject and background layers and matches light, color, and tone so composites blend realistically. To apply it place your subject on its own layer, select that layer, click Harmonize in the contextual bar, then adjust strength, warmth, and contrast and apply the effect on a new layer for easy fine-tuning.
Q: What does Object Mask do for video frames and how do I use it?
A: Object Mask detects and tracks people or objects across video frames so you can apply color grading, blurs, or effects without manual rotoscoping. Open a video layer, show the Timeline, select the subject in a frame, invoke Object Mask from the contextual bar to generate the tracked mask, and correct key frames if tracking slips.
Q: How does Assisted Culling speed up selecting the best shots from large shoots?
A: Assisted Culling scans large folders to identify top images by analyzing focus, faces and eyes, motion blur, and composition, and it lets you filter results by sharpness, angle, and other criteria. Load a folder into Photoshop or Bridge, enable Assisted Culling, review the ranked images, then star, flag, or color-label your selects and export the keepers.
Q: What performance and privacy tips should I follow when trying these AI features?
A: To get the best performance and protect provenance while you learn how to try Photoshop AI tools, keep GPU drivers updated, enable Use Graphics Processor, set a fast scratch disk, use Smart Objects, and close extra documents to save VRAM. Also review Content Credentials before sharing work, keep original RAWs safe, and test generative features on copies since some tools use cloud processing and may consume credits.
Contents